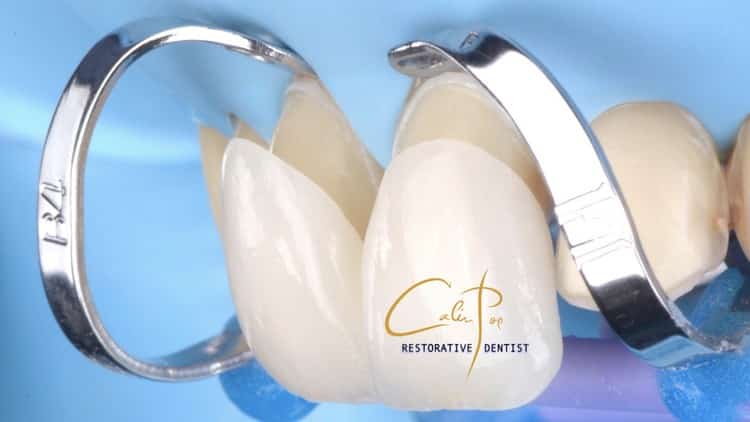
In this rubber dam placement guide, I will go over all the tools you need to start implementing rubber dam protocol in your dental practice.
There are countless benefits to using the rubber dam on your patients for basic restorative work. It allows you to work without obstruction, gives you a clean environment for bonding, protects the patient from possible aspiration & much much more. . .
However, it can be incredibly frustrating you don't have the proper training to implement rubber dam isolation in your practice.
I decided to make a STEP by STEP guide that reviews everything you need to know to get started immediately. . .
Lets jump right in . . .
RUBBER DAM ISOLATION BENEFITS
All restorative dentists need to learn how to apply the rubber dam for a number of reasons. I’ve listed my top 4 benefits below:
Visibility- If the rubber dam is applied correctly, you will automatically have increased visibility on the teeth that need to be restored. A tight cheek, large tongue & over-active salivary gland immediately vanish behind the rubber dam sheet which allows you to focus intently on the task at hand. Your work becomes easier when your focus in on teeth & teeth alone.
Retraction- Your assistant will thank you for helping them retract the tongue in lower quadrant cases where a curious tongue tends to drift towards the high speed drill. This can be incredibly tiring especially if you have a long appointment scheduled with your patient.
SURGICAL EXTRACTION TECHNIQUE COURSE!
Aspiration- You haven’t felt fear until you have seen a crown or implant screw swimming around the back of the patients throat. A “throat pack” does not give you necessary protection from aspiration.
A properly placed rubber dam gives you a much higher probability of protection from liquids or dental objects being displaced in the lungs of your patients.
Bonding- If you are practicing biomimetic dentistry then you should be concerning yourself with obtaining the highest degree of bonding in your restorative work. Rubber dam placement prevents moisture contamination much better than a cotton roll or dry angle will ever do.
RUBBER DAM CLAMP SELECTION
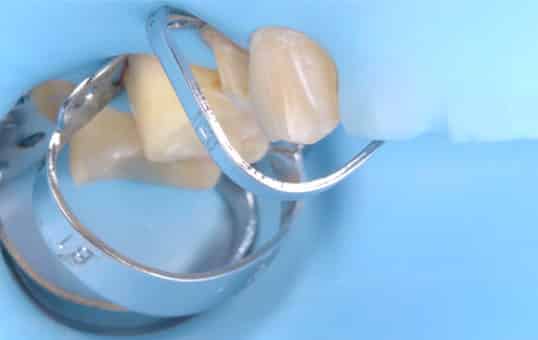
The first step in rubber dam application is selecting the appropriate rubber dam clamp(s) to get the job done in the best way possible. There are a variety of rubber dam clamps out there but in this guide I’m going to be using Dr. Calin Pop’s recommended clamps for proper isolation. His rubber dam course is incredible & has completely transformed the way I apply rubber dam.
I think the best way to get started is by listing out all the clamps needed & what tooth the apply to.
Rubber Dam Clamps | Availability |
|---|---|
12A | Lower Right / Upper Left Molar |
13A | Lower Left / Upper Right Molar |
B1 | Lower Molars |
B2 | Upper Left Molars |
B3 | Upper Right Molars |
B4 | Anteriors |
B5/B6 | Anteriors or Premolars |
2 | Premolar |
Let’s dive into how each clamp helps.
The 12A/13A rubber dam clamps are used as the master clamps on posterior teeth. It holds the rubber dam & is attached to the anchor tooth. The serrations give you more grip on the tooth and the smaller width side is applied to the lingual surface of the teeth. This is a general rule and should be considered for quadrant dentistry.
The B1,B2,B3 wingless rubber dam clamps are used for prepped molars, partially erupted molars or small molars. Consider using some of the clamps if you need to deliver a posterior ceramic restoration & require adequate isolation.
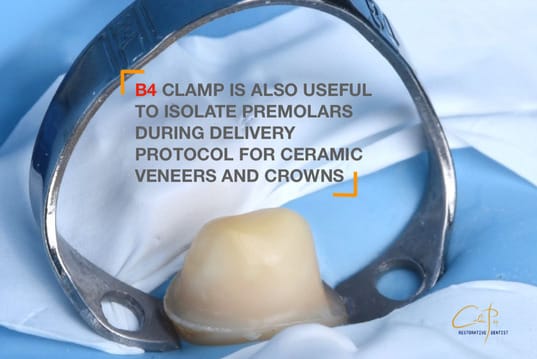
The B4 clamp is useful to isolate anterior teeth or premolars during delivery of ceramic veneers & crowns.
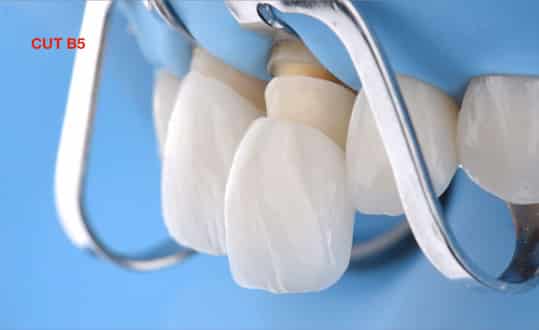
The B5 or B6 clamps are used when margins are deep ad stronger force is required to reposition the gingival tissue. Dr. Calin Pop shows a technique in one of his lessons where he cuts the clamp into two in order to deliver 2 units at the same time.
The “No 2” clamp from the hygienic fiesta kit can be used as an anchor clamp to provide more visibility & access as your work. It is typically positioned on the contralateral premolar w/out perforating the rubber dam.
Once again, thank you to Dr. Calin Pop for organizing & reassembling my rubber dam clamps in a way that makes sense. His course can be found here.
RUBBER DAM TEMPLATE
The second step in rubber dam application is to mark the rubber dam sheet w/ a sharpie. I have not used a rubber dam template since dental school. Each individual patient has a unique arch form; accordingly, prefabricated template will lead to inaccurate rubber dam placement.
I would encourage everyone to consider creating a custom rubber dam template for each patient the rubber dam is used upon. The steps are incredibly simple.
- Assemble the rubber dam sheet on your rubber dam frame.
- Use your finger to position the rubber dam sheet in a way that exposes the cusp tips of the teeth
- Have your assistant use a fine point sharpie to mark the rubber dam in the precise position of these cusp tips
- Displace the rubber dam away from your patient & hole punch each individual marking until complete
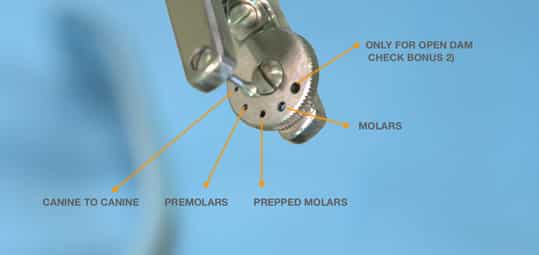
Each hole in your rubber dam forceps is indicated for a particular tooth in the arch.
The largest hole is reserved for the open dam. The second largest hole is reserved for molars, the third larges hold is indicated for prepped molars, the fourth largest hole for premolars & the smallest hole is for anterior teeth.
I will include an image from Dr. Pop’s course that will help you identify the appropriate hole selection. Remember to use a clean sharpened rubber dam forceps to be able to puncture more accurately.
After the template is punched you can move on to rubber dam application.
RUBBER DAM ANTERIOR TEETH
Rubber dam application for the anterior sextant can be incredibly simple. The first step is to create a custom rubber dam template & punch the appropriately sized holes.
Next, you need to attach the rubber dam to the teeth.
Many dentists use clamps to anchor the rubber dam; however, you can cut a small slice from the rubber dam sheet to wedge in between the teeth. I have included a picture below that shows this particular setup. In fact, my rubber dam youtube video shows this exact setup; I would encourage you guys to check it out below:
One major problem that dentists face is not having enough gingival retraction when applying the rubber dam on the anterior teeth. This is where floss ligature or additional clamp selection really shines.
Floss ligature refers to a technique where you manipulate the floss in a way that allows you to retract the rubber dam gingivally & provide more access to remove deep carious lesions.
This youtube link will show you how to do this.
Sometimes, additional clamps such as the B4 or B5/B6 give even more retraction to allow you to work more efficiently. Dr. Pop reviews this technique in depth in his anterior application section of his course.
Once the rubber dam is applied, you can prepare/restore the teeth without any interferences or distractions from the soft tissue in the mouth. In fact, you can prepare crowns under rubber dam isolation which we will talk about later in this blog.
RUBBER DAM POSTERIOR TEETH
Rubber dam application for the posterior quadrants follow similar principles as the anterior sextant. However, it is critical to have a master clamp that anchors to the molars. As a review, the 12A/13A clamps are incredibly useful clamps that help provide proper rubber dam isolation.
After preparing the rubber dam sheet and punching the necessary holes, you can move on to rubber dam application.
Some dentists prefer to apply the clamp first followed by the rubber dam sheet while other prefer to connect the clamp to the rubber dam sheet and connect the unit to the tooth.
This ultimately depends on preference of the provider but I would encourage you to try both techniques.
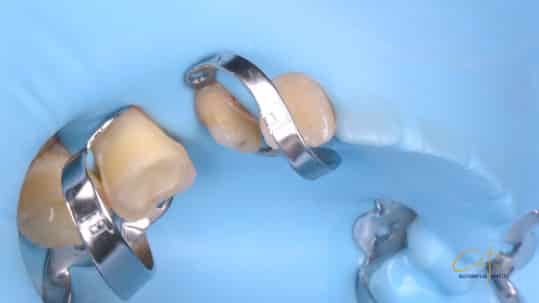
Winged clamp give you more retraction towards the back of the mouth. Wingless clamps are an alternative if the winged clamps cause any type of operative pain.
Finally, we want to be able to have a nice working view of our teeth. However, if the rubber dam is not stretched appropriately, we are unable provide dentistry efficiently & comfortably for our patients.
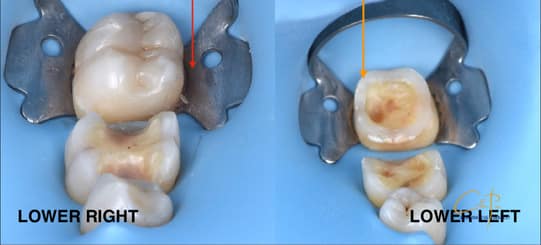
Traditionally, we are taught to punch holes that extend to the contralateral premolar. However, this can be more time consuming & provide more opportunities for rubber dam failures & micro leakage.
An alternative would be use an anchor clamp (No 2) over the non-punched rubber dam on the contralateral premolar. This is hard to put in writing so I’ve attached another image from Dr. Calin Pop’s course.
RUBBER DAM CROWN PREPARATION
Believe it or not, it is possible to prepare a crown with the rubber dam on. The same principles apply as mentioned above with a slight modification. The majority of the crown preparation can be complete using occlusal reduction burs and creating a circumferential margin with your preferred diamond bur.
However, if you need to perform sub / equigingival margins to mask discoloration on a tooth or to remove a deep cavity, the rubber dam can get in the way as you prep the tooth.
At this point you can create a split dam or you can remove the entire apparatus to finish the preparation including the cord placement and margin refinement.
To be honest, I do not do this often but I plan on implementing crown preparation under rubber dam isolation in the near future.
I will continue to update this blog post as I have more information regarding rubber dam placement. Thanks for reading!
Full disclosure: I receive a commission if you purchase the dental products through my referral links. This helps me run this blog & I appreciate the support.


